Say goodbye to manual counting and tedious data entry. Tvarana’s Inventory Count for NetSuite application is designed to streamline inventory management; simplifying inventory counting, saving you time, reducing errors, and improving overall productivity. From managing items with identical lot numbers to handling serialized products, Inventory Count is equipped with advanced features that cater to your diverse inventory needs. Read on to find out about two such features recently added to Inventory Count to significantly improve the inventory counting process:
Tally Count
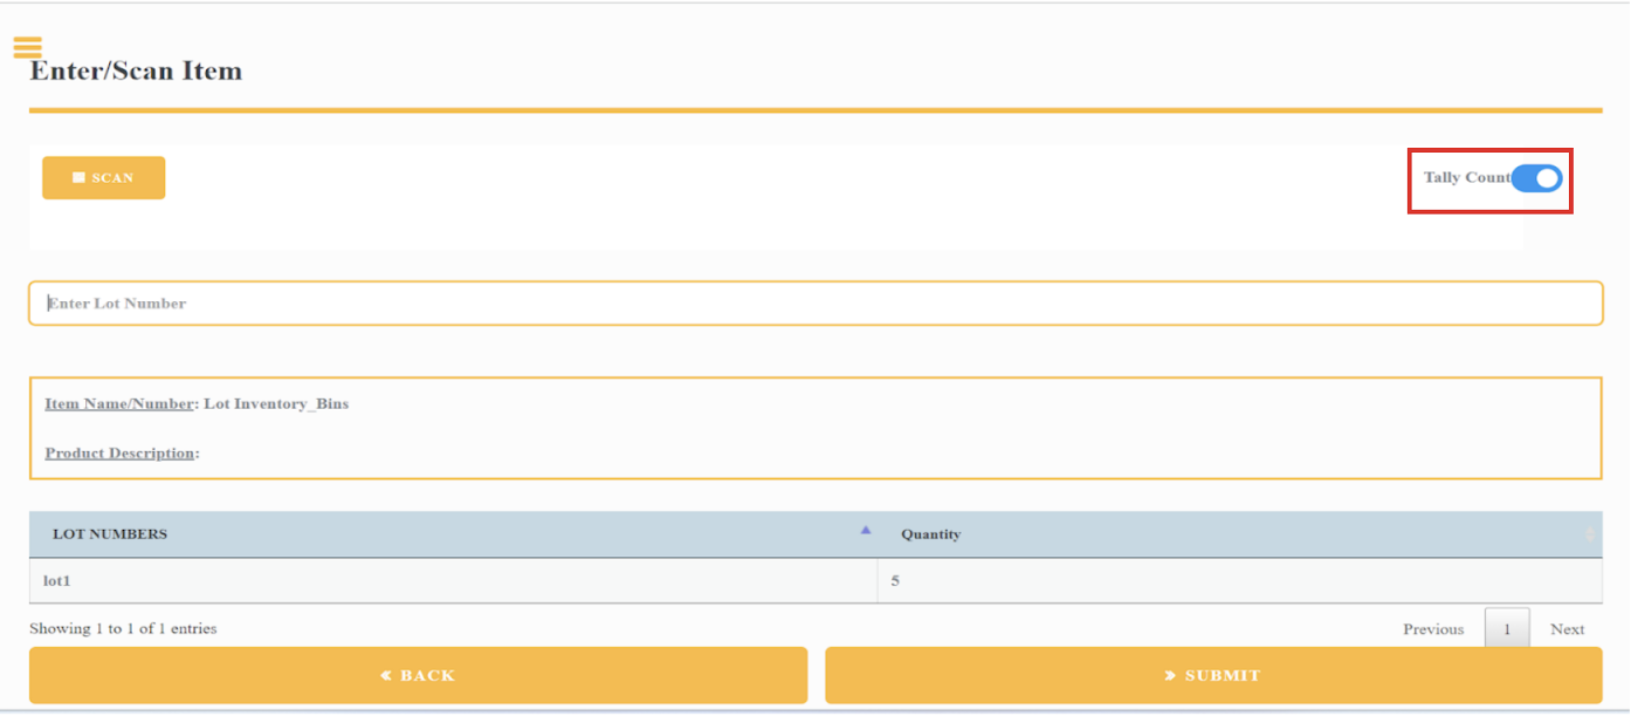
The Tally Count feature simplifies the process of counting inventory items with identical lot numbers. By default, the application displays an error message when attempting to count items with the same lot numbers. To address this, you can enable the Tally Count button on the user interface (UI). Here’s how the Tally Count feature works:
- Navigate to the Barcode Scanning page and select the desired warehouse location.
- If the chosen location utilizes bins, the system will automatically populate the bins for that location, and you can select the specific bin from the provided SELECT BIN list.
- Scan or manually enter the lot number for the item and click on the submit button.
- To increase the quantity for the same lot number, re-enter the same lot number in the “Enter Lot Number” field, and the application will automatically increment the quantity by one.
- Click on the Submit button to add the item to the inventory count screen.

Express Entry
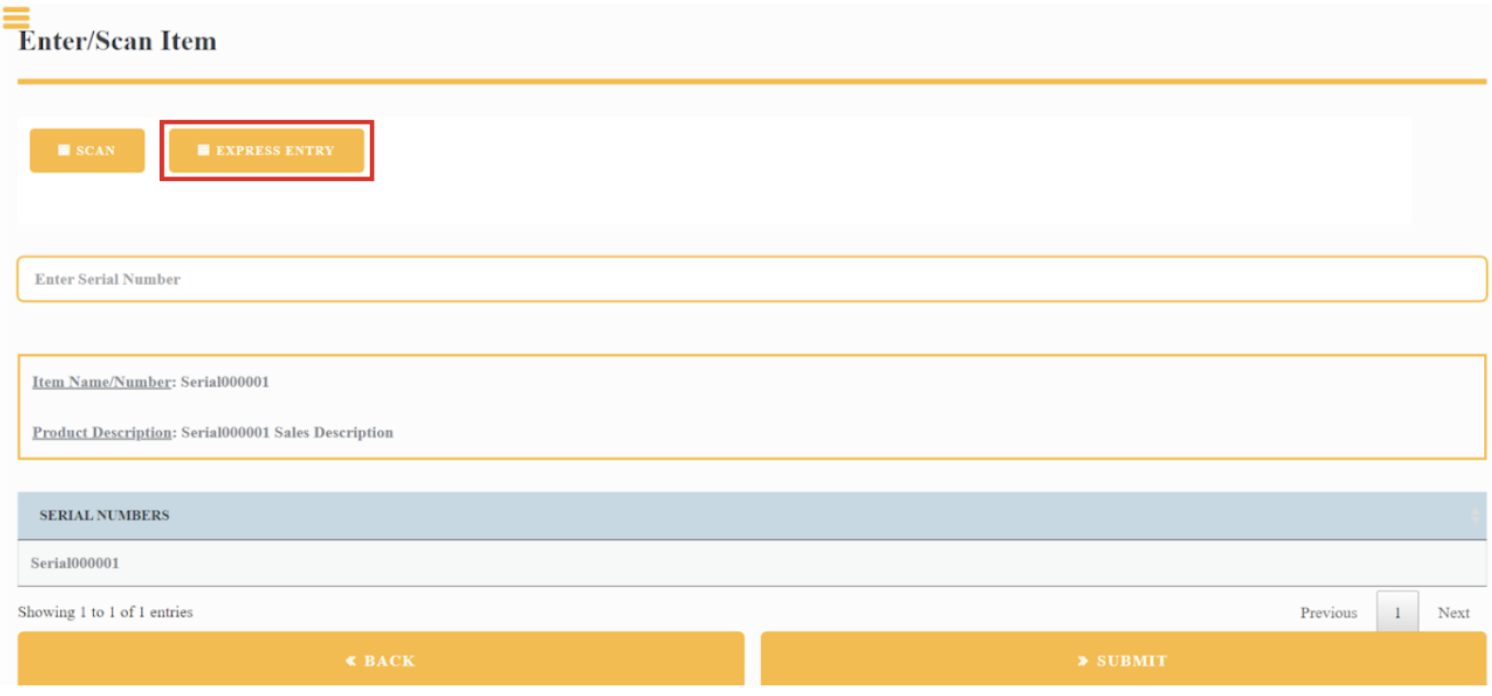
The Express Entry feature is designed for serialized items, streamlining the process of generating serial numbers automatically. Here’s how the Express Entry feature works:
- Navigate to the Barcode Scanning page and choose the warehouse location.
- If the selected location uses bins, the system will automatically populate the bins for that location, and you can select the specific bin from the provided SELECT BIN list.
- Scan or manually enter the serial number for the item and click on the SUBMIT button.
- Instead of entering each serial number individually, the Express Entry feature allows the user to enter all the required serial numbers for the item at once.

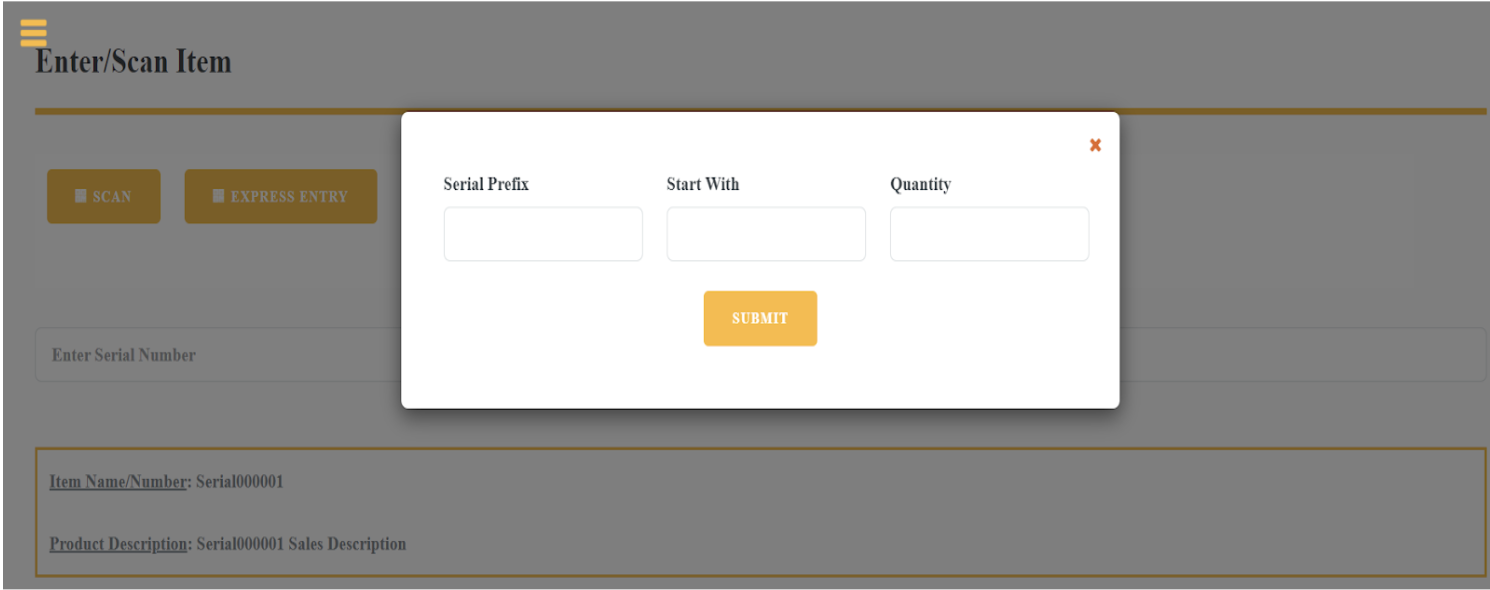
- Click on the Express Entry button, and a popup will appear with fields for Serial Prefix, Start With, and Quantity.

The Express Entry feature comprises the following fields: a. Serial Prefix: Enter the prefix of the serial number, if applicable. b. Start With: Set the starting number of the serial number after the prefix. c. Quantity: Determine the number of serial numbers to be generated.
- After entering the values for Serial Prefix, Start With, and Quantity, click on the SUBMIT button.
- The application will automatically add the generated serial numbers to the list.
- Click on the Submit button again to add the item to the inventory count screen.
Both the Tally Count and Express Entry features are aimed at streamlining the inventory counting process, ensuring accurate results, and preventing errors related to duplicate lot numbers or serial numbers. These valuable additions make the inventory count effortless and efficient for all users.
Want to learn more on what Inventory Count has to offer? Set up a consultation with us today!

