Are you manually entering Journal Entries on NetSuite for ancillary transactions such as write-offs, bank charges, or taxes? This process can be time consuming and prone to user error. Tvarana’s SuiteApp, Ancillary Charges, eliminates multiple entry issues and ensures that ancillary charge entry data is accurately reflected in Invoice statements and Journal entries. This SuiteApp automatically posts ancillary charges which have been entered in an invoice or via a journal entry, and applies it to a transaction. Ancillary Charges can be applied to transactions selected in the Accept Customer Payments record. Using the Ancillary Charges SuiteApp is simple, and can be done by following the steps below:
Setup Ancillary Charges
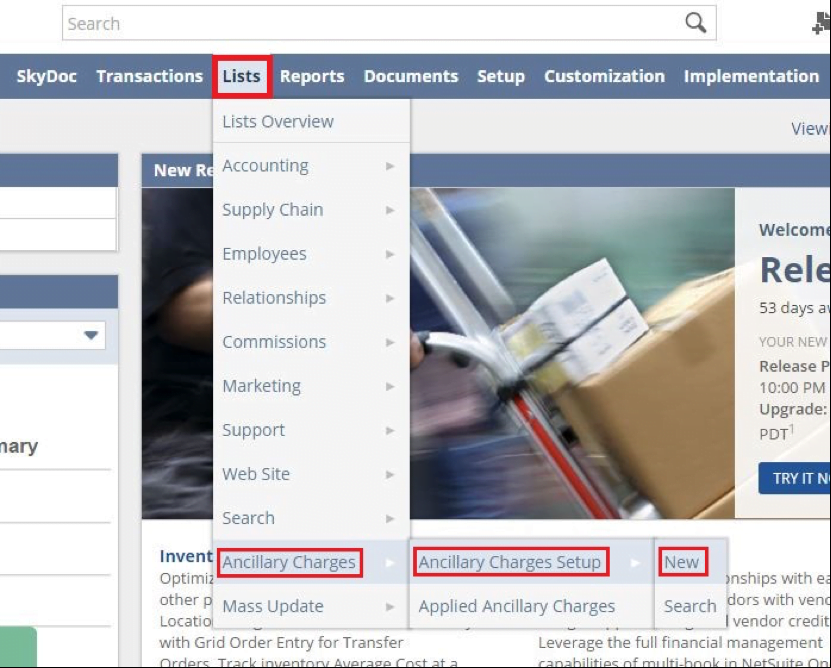
- Navigate to Lists > Ancillary Charges > Ancillary Charges Setup > New. This can be found in the global search as well.

- Create new Ancillary Charge by filling in Name, Debit Account & Credit Account. Setting up the accounts are required, as these are the reference while creating the journal entries for future expenses.
Apply Ancillary Charges to selected invoices/journals
Ancillary Charges are applied to invoices/journals in the Customer Payment record following the steps below:
- Navigate to Transactions > Customers > Accept Customer Payments.
- Get the Invoices/Journals in the list
- Fill in the necessary fields in the Payment form. This lists down all the Invoices & Journals with Pending Payment for the selected Customer in combination with the selected AR Account.

Note: If there is only one AR Account in a NetSuite account, then the option for AR account selection will not be seen in the Payment form. In case an Ancillary Charge is selected where the AR Account is to be credited, then the AR account mapped for that Customer is considered.
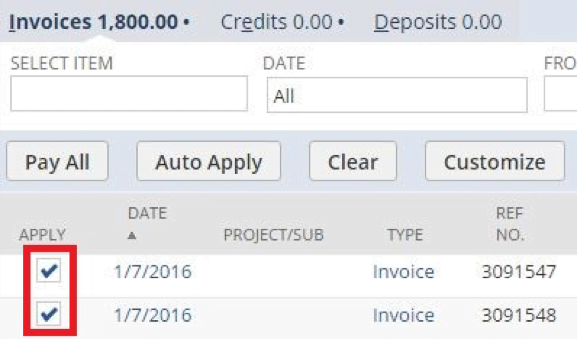
- Check one or more invoices/journals and apply the payment value with respect to each selected transaction

Applying Ancillary Charges
- The selected transactions show up in the Transaction Number column field under Charges Tab in the same Accept Customer Payments record
- Choose the transaction, enter the Charge Amount for the selected transaction and select the appropriate charges
- You can enter multiple charges for the same transaction by adding a new line and following the above step

- Process the payment to apply the charges for the respective invoices or journals
List of applied Ancillary Charges
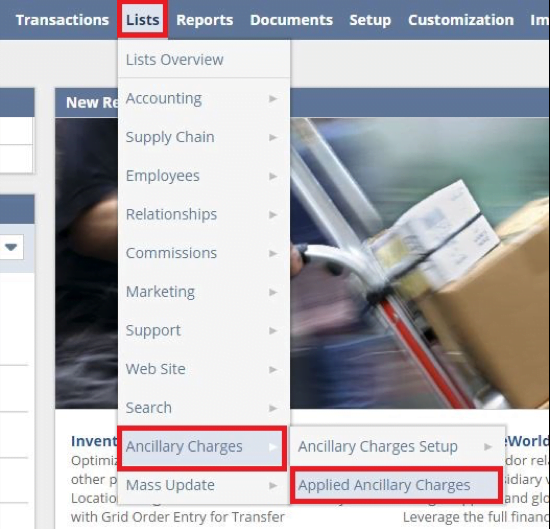
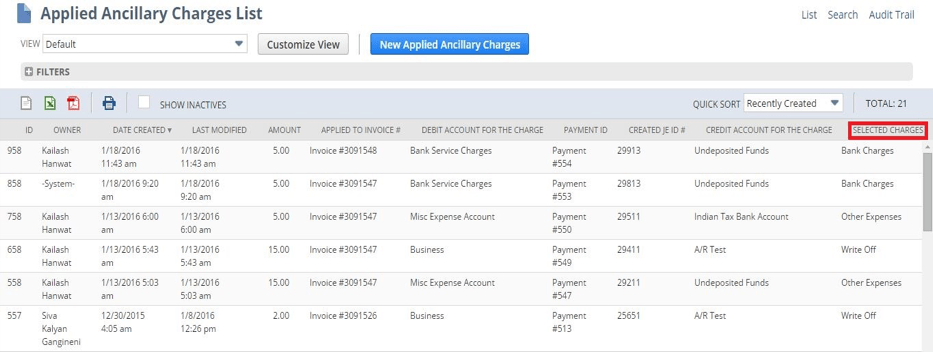
- All Ancillary Charges applied/created are listed in a Custom Record called Applied Ancillary Charges. To view applied ancillary charges, follow the navigation Lists > Ancillary Charges > Applied Ancillary Charges.

- This lists all the charges applied to various transactions as seen below:

Wondering how the Ancillary Charges SuiteApp can streamline your accounting processes? Set up a demo with the Tvarana team to learn more today.

